Homemade Peanut Butter

I really love my peanut butter on a piece of toast in the morning.  I've tried the generic brands and was less than impressed with the smell and taste.  So either it was go expensive or find an alternative.  I found a post online about making my own and thought ok I'll try that.  So I bought some honey roasted peanuts.


Put them in my generic magic bullet processer. 


and a grinding I went.  I was a little learry that this was going to work.  As the post said..don't add anything, no water, no oil just grind till peanut butter.  I used the flat blade that came with the blender.  I tried the other blade but it didn't work as well.  After about 5 mins this is what I got.


It is absolutely delicious.  So much better than store bought.  Best part is I can make it as creamy or crunchy as I want.  If you make it real creamy I'd suggest storing it in the fridge otherwise the natural oils will come to the surface.  Just stir before spreading and its perfect. From what I understand you can use any type of nuts with the same results.

posted under | 0 Comments

Natural Soothing Salve

Did you know that a tiny little tube of neosporin costs almost $6.00.  Since my husband has been out of work for more than a year and a half that is a bit expensive when I can make 10oz of homemade salve for way less than that. Best part is I can find all the herbs I need in my backyard.  I use Comfrey, Calendula, Yarrow and Broadleaf Plantain.  If you don't know what that last one is, google it.  I think you'll be surprised.  I have it growing all over in my grass and always thought of it as just a weed.  It has some amazing properties.  I infused 1/4 cup of each in a clean spagetti sauce jar along with olive oil.  After a few days of infusion I add 1 cup of this oil to 1 cup of coconut oil and some beeswax.  Thats it...a wonderful salve for sunburn, bug bits, cuts, scraps, excema.  I've been using it on dry cuticles for the last few days and they are nice and soft again.  I've even used it on my dog who got into something and has been scratching his stomach.  He's felling much better now.  Its a great anti-itch salve too. 

posted under | 0 Comments

Homemade Lip Balms

I was never really a fan of store bought lip balms.  They always felt waxy when I used them.  So I decided to try and make my own.  I use 5 ingredients, coconut oil, mango butter, vitamin e oil, beeswax and zinc oxide.  The zinc oxide is there to add some sun protection.  I ordered some sample flavor oils from www.brambleberry.com to try out.  I tried vanilla icing, mint, lemon pound cake, rainbow sherbert and watermellon.  I love the vanilla, lemon, mint and watermellon.  They are fantastic.  The rainbow sherbert really didn't smell like rainbow sherbert, its kind of has a hint of floral to it.  But I still like it.  I'm really pleased with the way these turned out.  I carry at least on of them on me at all times. 


I got the containers from www.elementbathandbody.com.  They even have these really great shrink wraps for the tubes.  I started just pouring in the tubes by hand but a lip balm tube tray to fill the tubes is so much easier.  I even used the same recipe to make a homemade sunscreen that works great.  I'm not a burner in the sun so this recipe might now work for those with more sun sensitive skin. Just keep that in mind when making homemade suncreen.  Some people are more sensitive than others.

posted under | 0 Comments

Homemade Lime Deodorant

Have you ever looked at the ingredients on your store bought deoderant.  Its pretty scarry.  Try googling a few of those ingredients.  Many contain Aluminum Chlorohydrate as a main active ingredient.  Besides being linked to cancer and Alzheimers, I don't think applying anything with aluminum is a good idea to apply to my skin.  So I looked for an alternative.  I found I could easily make my own deoderant with 3 simple ingredients, Coconut oil, arrowroot powder and baking soda.  Wow really...coconut oil and baking soda can be found in any grocery store.  Arrowroot powder is alittle harder..you can find it at health food stores or online.  I got mine from www.brambleberry.com.  I can get it by the pound, besides I can use it in cooking too.  You'll need some beeswax too, thats what holds it all together. I like the lime essential oil because of its antibacterial properties and its a nice scent, but you can leave it unscented. I found these really great 2oz push up containers from www.elementsbathandbody.com.  They are perfect for deoderant.  I love this deoderant, I'll never buy store bought again.  Go ahead try it yourself, or if your too busy I do sell these at $4.00 for 1 or $10 for 3.  I have 3 types, lime, lavender and unscented.  If you are interrested send me an email to midwestgreenworks@wi.rr.com.  Let me know what you want and I can set it up for you to buy from my esty store.

posted under | 0 Comments

My adventures in Making Homemade Soap

So keeping with my nature them, I've started an adventure into making homemade soap.  I was a bit leary as it required me to use sodium hydroxide, which is know as lye.  I did my research and in I jumped.  Not wanting to wait for my new soap to cure, I decided to try what they call Hot Processed (HP) soap first.  It requires the use of a double boiler, which by the way is almost impossible to find locally, or you can use a crockpot. Ooooh I have one of those.  Plus you need some sort of mold.  I chose to not invest in something expensive till I get the process down a bit, so I used an empty, clean pringles container.  I infused some olive oil with calendula petals (thats marigold flowers).  I also used crisco, coconut oil and castor oil.  A pretty simple recipe.  Plus lye and water and off I went.   Here is a picture of my first batch of HP soap. 

It really turned out great.  I was able to try my soap the next day and I absolutely love it.  It has a nice lather and it doesn't dry out my skin.  I have sensitive skin so this made me really happy.  This batch is unscented.  I made a second batch the next weekend and got a bit more ambitious.  I used crushed lavender and used a lavender essential oil.  It smells lovely.  I'm not big on scents so I kept this one real mild.  Here is a picture of the lavender HP soap.


After 2 sucessful attempts at HP soaps I decided it was time to go for it and try Cold Processed (CP) soap.  What is the difference you ask?  Well with HP soap you speed up the process where the lye and the oils react with each other called Saponification.   This makes the soap usable immediately after cutting.  The heat from the HP process helps the water to evaporate. However, if you let it air dry for a week or so it will last longer as the bar hardens. With CP soap the soap needs more time to get the water to evaporate.  This type of soap needs to cure (sit) for longer 4-6 weeks before use if you want a harder bar of soap.  It can be used sooner but will not last nearly as long as it would if you wait.  I decided to really be adventurous with this batch.  I figured if I was going to mess it up, I'd like to go big.  I used the same recipe as with the other two batches but this time I added alkanet root to half the batch to add a purple color.  I also added a red apple fragrance that I got as a sample from and order I placed with www.brambleberry.com.  Well I'm happy to say, I was pleased with the results.  I forgot to pack the mold so I had some air pockets but it was mostly all good.  Now to wait before using, but it smells and looks delicious. 


Now the only question is what am I going to make next.

posted under | 0 Comments

No Shampoo

In honor of Earth Month I have been trying to go more natural.  As you have seen from my previous post I've made my own homemade laundry detergent. 

I have been searching and searching for a really good shampoo alternative.  I have relatively thin hair and I find that by the end of winter my ends look like a frayed mess.  I've tried several different shampoos and conditioners that work for a little while and soon I'm back to the same old problem.  Searching the inter net I found several post called No-Poo, meaning no shampoo.  Well I thought that could be interesting.  This method calls for using baking soda and water.  That's it!  Wow that's pretty simple.  I figured I could handle that.  So a week and a half ago I tried it for the 1st time.  WOW, I am amazed.  Not nly was my hair clean but I was able to comb through it with no conditioner. It was soft and I found that I had less hair loss during the washing/conditioning process.  I have continued to use this method 3 times a week, with rinses only in between.  I'm going to give it at least a good month.

The thing about shampoos is they are made to strip all the natural oil from your hair.  This is bad because your body produces those oils for a reason.  So if you take all the oils out, you could end up with overly dry hair or hair that is too oily because your body will over produce oil to compensate.

So far I have been happy with the results. However, my cousin tried this method and she didn't like it.  She said her hair she said her hair seemed oily.  I have read that this can happen. Give it a little time for your body to re-adjust itself.  I say give it at least two weeks minimum.

posted under | 0 Comments

April is Earth Month

In honor of Earth Month, I want to share my homemade laundry detergent recipe with you.  I use 3 simple ingredients and my clothes have never been cleaner, softer and fresh.  After looking at the ingredients of most of the store brands, I've decided that my family is much better off with this simple eco-friendly recipe. Here are the 3 things I use.


I have found the borax and the washing soda pretty much everywhere.  My local grocery store has it, Walmart, Ace Hardware, etc.  Just look around in the stores laundry isle and I'm sure you'll find it. So that's the easy part.  Now the Zote on the other hand I only found at Walmart, however there is an alternate washing soap you can use called Fels Naptha. I have found that at 2 other stores. It will have the same result.  So now the question is what do I do with this stuff.  The recipe is easy. 

Use a cheese grater and grate the entire bar of washing soap (zote).  I find it easier if I unwrap and let the bar of soap sit out for a week or so to let it dry out some.  I grate it into a 5 gallon bucket just for ease of use. Now that you have your grated soap bar you can make the laundry detergent.

1 Bar Grated washing soap (zote)
1 Cup Borax
1 Cup Washing soda

Now you can use it like this, but I find the cheesy like soap a little odd, so I take a cup at a time and put it in a blender and blend it up.  This make a real nice consistent powder.   Now its ready to use.  Use 1-2 Tablespoons per load depending on dirt. 


What is great is:

  • No suds, so safe for top, front and High Efficiency washers
  • Safe for delicate items
  • Safe for sensitive skin (I have sensitive skin, eczema, and if works great)
  • Great price..if you buy 6 bars of soap and 1 box of borax and 1 box of washing soap you can make enough soap for 365 loads of wash.  One wash a day for approx. $15.00 depending on where you get the ingredients. 
So there you have it.  Simple, easy, eco and pocket friendly laundry soap.  It also makes a great carpet cleaner too!   

posted under | 0 Comments

Silver wire necklace with matching earrings

 This is the complete necklace and earring set

 Close-up of the earrings

Close-up of the necklace


This necklace/earring set were made from standard jewelry wire purchased from Michael's craft store.  I was actually somewhat surprise at how easy it was to create the shapes on the necklace.  I really had no idea what I was going for when I started.  I started with a simple wire coil that I then stretched the coil and wrapped it again.  I just went with it and this is the final result.

posted under | 0 Comments

Necklace made from waste welding wire.


I've had a bit of crafting block for the last few months.  I haven't really even had the urge to create anything but a few simple thank you cards.  Well the block is now gone and I'm back on track again.  My husband is a welder by trade and is out of work at the momment.  He has been picking up some odd jobs using his own welders he has in our garage.  Many times the welder will spit out extra wire that he can't use again.  He was just throwing this wire in the trash until I stopped him.  I told him I could make something with that.  Here is my first attempt at making something out of the waste welding wire.  I was going to post it on my new esty shop but I brought it to work to show off and my boss snatched it up before it ever made it to the shop. 

posted under | 0 Comments

Martha Stewart knitting loom set

Since I loved my round knitting looms so much, I figured I'd invest in the long loom set.  I contemplated between the Boye set and the new Martha Stewart loom set that just came out.  After a bit of research I decided to go with the Martha Stewart set. It was $39.99 at Michael's.  I bought it with a 50% off coupon. Here is a picture of everything that comes in the set.


That is everything laid out on the table.  What I liked about this set is that I can make many different configurations for whatever I might need.  You can make round, square, oval and rectangular looms with this set.  It also comes with a knitting tool, weaving tool, crochet hook.  It also comes with a small and large yarn needle.  The knitting tool is very flimsy in comparison to the one that came with the Boye set.  In fact at Michael's you can buy extra knitting tools just like the ones that come in the Boye sets for only $.99.  I bought two extras.  I'll be using those rather than the Martha Stewart one. I haven't used the looms to make anything yet, but I have tried to assemble the pieces.  I found assembly to be very easy and the pegs go into the holes very easy and seem very solid when they are in the holes.  I look forward to using this loom set.  I'm going to try making some scarves and maybe even an afghan.

posted under | 0 Comments

Boye Round knitting looms

When I was younger I my Aunt taught me how to crochet.  I haven't done it in years. I had heard and seen knitting looms and thought it would be interesting to try them.  So I bought the Boye round loom set.  They were $16 at Michael's and I used a 40% off coupon.  Yarn was also on sale so I bought two skeins of yarn.  Total investment less than $15.

The set comes with 4 round looms in various sizes.  I've only used the orange loom and the purple loom so far.  The also come with a plastic needle and a hook.  They come in a plastic carrying bag.  The bag is nice but its suppose to have a slider lock on the top which mine came broken.  I still use it to store the looms when I'm not using them.  I've made several hats already and it was really easy.  It took me a little while to get things started the first time.  Once you get the hang of it the process is really easy and I can do it while watching tv. I'm going to be making hats for the work project that I talked about in my last post, Caps for Cancer.  I'm really glad I made this purchase and several of my co-workers have already asked me if I can show them how to do this.
Here are 3 of the hats I've made so far.  I also made one for my mother and my husband.  My co-worker loved the hats so much, she asked me to make one to match her coat. She paid me $20 for it.  My husbands friend also asked me for 1 for himself and one for his mother.  I can make one a day if I want but my hands get alittle sore if I do that much at a time.  Its found it to be really relaxing though.

posted under | 0 Comments

Caps for Cancer

My work, AAA Milwaukee, this year has come up with a community ambassador project that anyone can participate in. We are going to be collecting hats, scarves, booties and plush stuffed animals for cancer patients. I bet that if you ask anyone, they can think of someone who has been affected by cancer. We are going to donate these items to our local area hospitals where cancer patients will be able to pick out an item of their choice. If you would like to participate we are looking for items for all ages and both male and female. Items must be new if bought, please keep the tag on when you send it. Also we welcome handmade items. In both cases, new and handmade, try to choose soft materials, no wool please. We will be collecting items all year. Spread the word and tell your friends. Items can be sent to AAA Wisconsin, 4433 S. 27th Street, Milwaukee, WI 53221. Attn: Caps for Cancer. We appreciate anything you can donate. I will be making some hats myself and welcome any left over yarn you may have have.

Update:  I am so proud of my co-workers and the community I live and work in.  At years end we were able to donate over 768 items to our local cancer center.  The hospital has been so appreciative of our donations.  Everytime we dropped off a box they were so excited because they said they were almost out.  I think there is a bit of a misconception that people think these cancer centers get this kind of stuff all the time when if fact they never have enough.  My workplace has decided to continue to collect itmes this year as well.  Every little bit we can give helps.  Thank you again to everyone who has sent donations. 

posted under | 0 Comments

Aluminum can earrings

I've been very busy making these earrings.  I'm going to be participating in a art/craft fair at my local botanical gardens in December and need to get some inventory up for that show.  I've been very pleased with the results.  One can actually produced 6 completely different looking earrings.  Plus its they are fun to make.


posted under | 0 Comments

Too Cute not to share

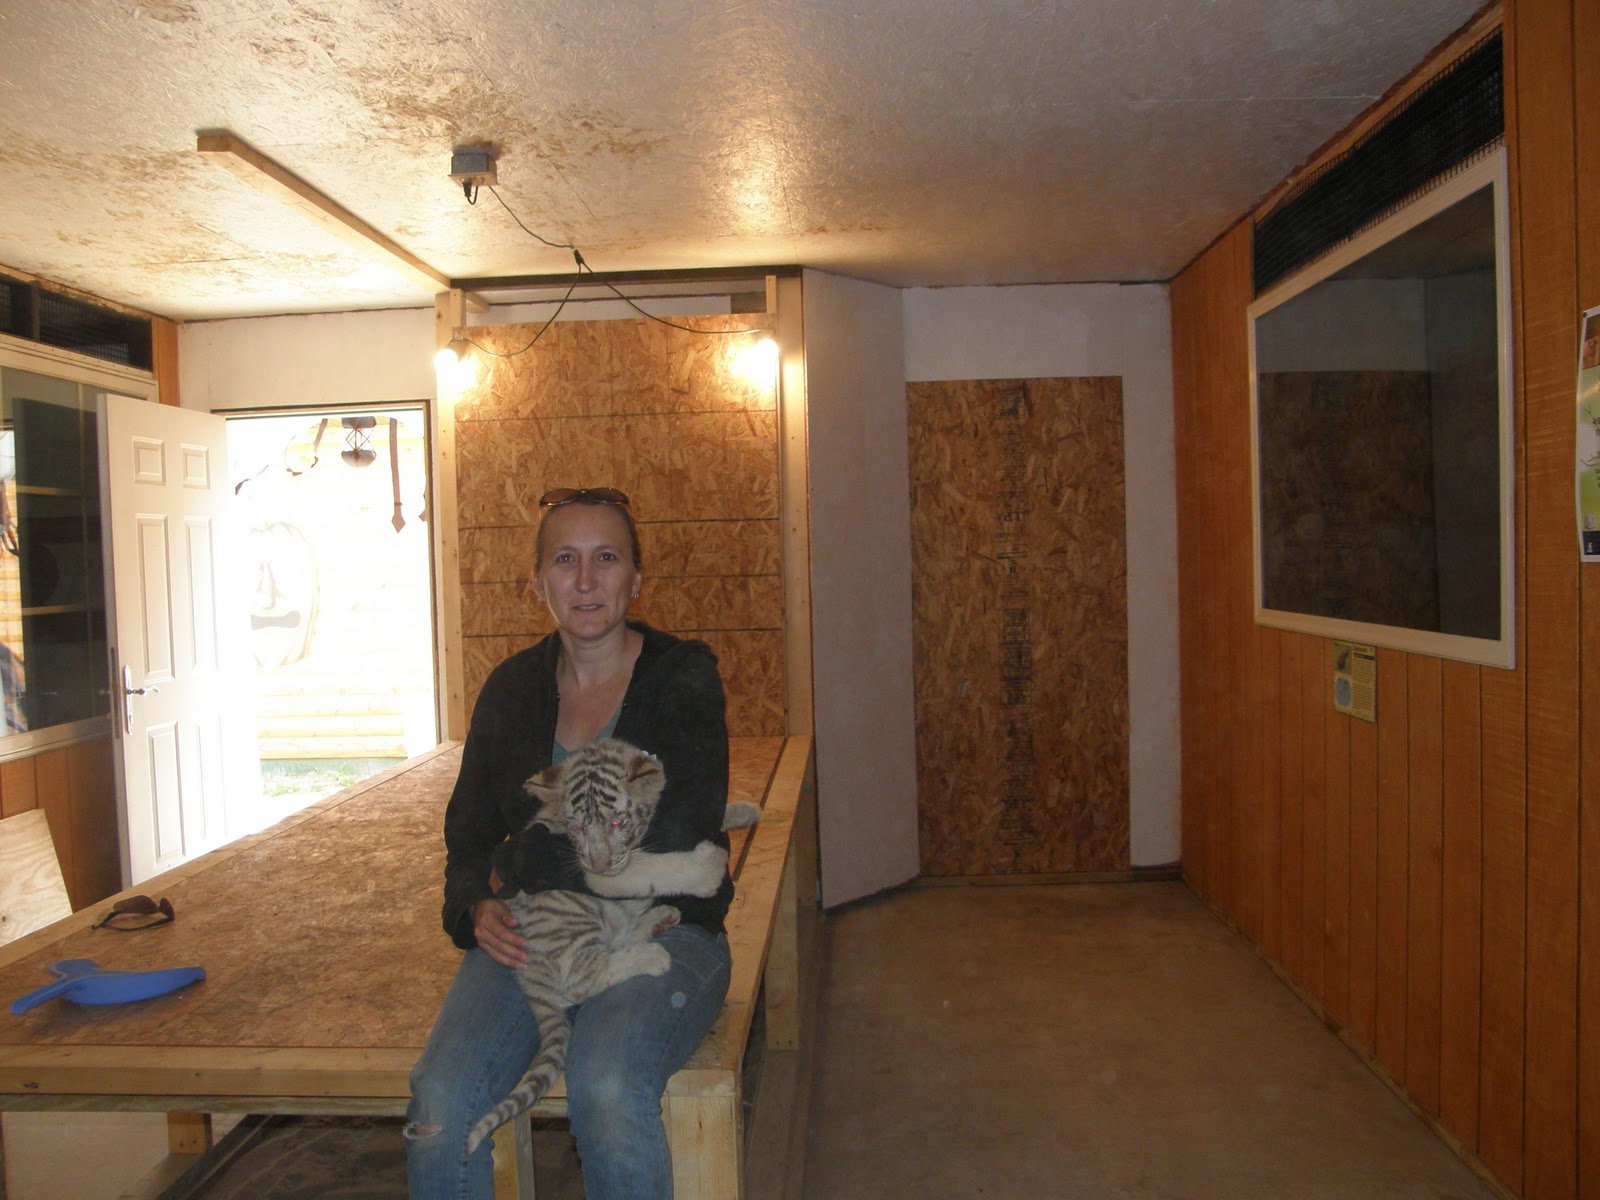
My husband and I visited Lakewood zoo in northern Wisconsin this past weekend.   We have a cottage near this family zoo (animal rescue).  This past August we visited and found out they had some baby tigers.    The one in this picture is only 7 weeks old so she can't be touched yet.  She has 3 sisters. 


The other 4 were born 3 weeks before the one above.  As of September 24th you are able to touch, pickup and play with the first set which is now 10 weeks old.

posted under | 0 Comments

More recycled flowers.


I made some more flowers from aluminum cans and plastic soda bottles.  The two larger flowers on the left and the two plastic ones on the top right I used alcohol inks for the color.  The bottom right I used regular spray paint.  Kyron seems to work the best.  Its really best if you put a coat of primer on first, otherwise the color tends to want to run.  Also you need to careful not to put too much spray on at a time.  This causes the paint to crackle.  I really like the alcohol inks.  They coat well on both the aluminum and the plastic.  The alcohol inks can be a bit expensive.  $10.00 for three .5fl bottles, but if you get them while they are on sale or use a coupon its not so bad. I just picked up 3 for $6.35 today at Michaels. 

posted under | 0 Comments

Recycled water bottles

Yes I'm kind of on this recycling kick.  Of course that is not a bad thing.  My work is giving out water bottle this week to people that come in.  Alot of empty bottles are ending up in the garbage  and I thought, what a waste.  So I took some home and thought what can I make out of these.  Well here is my first attempt at flower.  I used oil paints to color the pedals, which really took very little paint to coat.  I wanted retain some of the clear transparancy so I didn't want to completely cover the plastic in paint.


Update:  So I figured out today that oil paint is not the best type to use on the plastic.  I goes on good but takes forever to dry.  Still wet in the morning.  I tried paint that is used on ceramic and glass.  It tried really quick for me.  I'm also going to try using some alcohol inks.  I saw it used by someone else but not sure how fast it will dry.

posted under | 0 Comments

Recycled aluminum cans

I like to call them re-inCarnations.


Yes these are made from aluminum cans.  The only new thing on these is the brad in the center.  Otherwise I used an empty can and some spray paint my husband had left over in the garage.  I put a clip on the back of one that I can use as a pin.  I haven't decided what I'm going to do with the other one yet.

Update:  So I tried to make some more of these.  I used the same method but this time I tried to paint the pieces before I put them together.  I think I put the paint on too thick because as it dried it started to crack on me.   Good thing is I didn't have alot invested in the materials.  The other problem is I painted these outside as it was starting to get dark.  As they dried the crackling in them actually added some character so I'm going to use it.  I did find a better coloring material.  Alcohol inks !!.   I've had a set of these that I used like once on something and didn't like it.  My co-worker suggested I try them on the aluminum.  Oh my,  I'm in love with alcohol inks now.  Went out and bought 2 more sets of 3.  I now have 9 colors.  I bought the the little stamper thing for the inks and found that they use simple felt stuck to the velcro on the pad.  So I bought a big sheet of white felt and cut it into squares to use on the stamper.  Cost me $0.25... much cheaper than the $4.00 they charge for the pre-cut ones that Tim Holtz packages.  I can't believe anyone would buy those.  I also found out that you can use punches on the aluminum as well.  Its a bit hard but if you put it on the floor and push your knee into the punch it goes right through. 

posted under | 0 Comments

New Stamping Company Check them out

For those of you who are stampers, there is a really unique new company that I learned about today.  They are called Raisin Boat.  I don't really get the name but the concept they came up with is an excellent idea.   They have a really great assortment of original stamps that you have the option to buy straight out or you can rent them.  Yes I said rent them.  Just like Netflix.  They have different rental plans that you can sign up for and the shipping is free to you and back again.   Its great for people who don't have alot of room to store stamps or if your like me, you just can't see investing in a stamp set that you may only use for one project. 

Here is their website if you'd like to check them out.  http://www.raisinboat.com/

posted under | 0 Comments

Vinyled Water Bottles

My co-worker asked me if I could put names on some re-usable water bottles she bought on clearance at Kmart.  Her and her girlfriends are going to have a girls weekend up north in July and everyone brings something.  She thought it would be neat to have everyones names on the water bottles so they wouldn't mix them up.  So I did that for her using outdoor vinyl so when the bottles sweat it wouldn't fall off and of course then they would be washable.


She loved them and couldn't believe that I finished them in one night.  It was so super easy to do.

posted under | 0 Comments

Card for my Father-in-law

My father passed away a little over  a year ago.  Although I miss him so much I am so gratefull to have my Father-in-law.  He has been really great and treats me like I am his daughter.  This is the card I made him for Fathers day this year.

posted under | 0 Comments
Newer Posts Older Posts Home

Crafting Supply search

Custom Search

About Me

I've always been interested in arts and crafts all my life. I've dabbled in a little bit of everything, from drawing, painting, woodcrafting, metalworking, beading, papercrafting. I love all types of medium.

Welcome to Midwest Greenworks

I've created this blog as a way to share the different crafts and arts I've created. I use a variety of material and styles. If you have any questions about the items I share, feel free to send my a message and I would be happy to answer.


Followers


Recent Comments